Thursday, March 24, 2011

Country Living Fair Post 1 - Framed

Last September I had the chance to go to the Country Living Fair in Columbus, Ohio. There was SO much to see! So many creative people! I took tons of pictures and came across them the other day so I thought I'd share them. I will post a few at a time since I have so many. This first post's theme is "Framed" as you may have figured out. Enjoy & be inspired!


Friday, March 18, 2011

Revamped Letter Holder

Today I'm posting some pictures of my most recent project. I just finished it last night actually! The weather here was AWESOME yesterday. It gave me some motivation to go outside and paint some projects I had sitting around.

The one I'm featuring in this post is a recent antique mall find. I had been looking for something to hang in our kitchen to hold mail and keys. When I saw this I knew it was perfect for what I needed in terms of practicality but as far as looks go it left a lot to be desired.

Here is what it looked like when I bought it:


I wasn't too sure what color I wanted to paint it but when my husband said
"can we paint it a color please??" I knew exactly what color I'd paint it. Especially since the 2 colors I was considering were cream or robin's egg blue. He isn't a huge fan of all the neutrals: creams, grey-greens and such that I tend to go for. So compromise was the name of the game and I LOVE the way it turned out. Thanks honey! :)

So, first of all I removed the metal plate that read "letters" and decided to hand-paint something in its place. I started by cutting a template w/ my creative memories circle/oval cutting system.


I painted the whole thing robin's egg blue. It's kind of hard to see in this picture because it was evening and the lighting was pretty terrible but you get the idea.


I used my template to trace my oval and some other little fancies onto the letter holder. I don't have a picture of it but I created a template using a punch I had for the scallop edge. For the numbers & "Mail" I just chose a font that I liked on the computer and then used tracing paper to trace them on. Then I very carefully hand painted everything. This was the longest, but most fun part of the process!


So now that it's all perfectly painted and pretty looking it's time to mess it up! :) Ok, I lied - this might be the most fun part. I just took one of those sanding spongy things (you know what I mean right?) and sanded until I liked the looks of it. I tried to make sure to sand extra where a piece like this would naturally get worn over time.

After sanding I took some brown glaze and wiped it on & off with paper towels until I was happy with it.


It takes quite a while to do all the hand painting and I know that some people would really hesitate to sand and glaze over something that took you a while to complete but I love the look of the weathering. I think that the hand painted details look even better when a little of the paint underneath shows through.


So, what do you think? :)

Today I'm linking to:


Chic on a Shoestring Decorating


a href="http://romantichome.blogspot.com/">

Monday, February 21, 2011

Homemade Bisquick

So today I am posting another non-decorating post. I enjoy variety in my post topics and I hope you do too! The recipe I'm sharing today can be a really big money-saver if you use a lot of Bisquick or really if you use even a little. Bisquick is pretty outrageously priced these days!

In the summer our family loves to have strawberry shortcake and the kind we like best is made with Bisquick. Every time I put it in my cart I felt guilty for paying the high price for a "splurge item" so I went in search of a recipe for a homemade version. The nonfat dry milk is admittedly a little pricey but when you figure the cost per batch compared to a box of Bisquick, well, there's really no comparison.

This recipe is really simple and our family can't tell a difference in taste from the store-bought version. I store mine in a modified "Whale of a Pail" ice cream container in my cupboard. This batch almost fills that size container. I mix mine in my electric mixer but I'm sure you could do it by hand as well.

The recipe I'm sharing can be found by clicking here.

I hope you enjoy it! :)


Homemade Bisquick

8 cups flour
1 1/4 cup nonfat dry milk
1/4 cup baking powder
1 tablespoon salt
2 cups shortening

Combine flour, milk, baking powder and salt. Cut in shortening. Store in tightly closed container in a cool place. (Cupboards are fine as long as it doesn't get hot.) Use anywhere Bisquick or other biscuit baking mix is called for.

Sunday, January 30, 2011

Paula Deen & a return to blondness

Well it has happened. I have given in and snatched up this wonderful set of Paula Deen cookware that I have been needing........ ok wanting, since I first saw it. Isn't it just lovely?? Seeing as it is my favorite color, not to mention the exact color of my kitchen backsplash it was love at first sight. Put that cookware love together with some leftover Christmas/birthday money and the set is mine! :) In all truthfulness I have been needing some new cookware pretty badly. Ours is a set we got for a wedding gift. We registered for a very inexpensive set and we discovered that in this case - you get what you pay for. Admittedly we were pretty hard on it. It did occasionally....... ok - usually get washed in the dishwasher for it's first year or so of use. But anyway, enough w/ the confessional. Here are some pics...............

Here is a shot of my cookware in my remodeled kitchen. I am planning a post with more pictures and details about my kitchen.


Ok topic #2. As a little girl I had very blond hair. Somehow over the years that color started to fade and my hair became a lot darker. I actually liked the darker color fairly well but felt like I needed some change. So, I pulled out my box of this:

My husband has for the last i-don't-know-how-many years wanted me to go blond again. REEEEALLY blond. Until now I haven't had the guts. Not sure what changed but my hair color sure did!

Here is a before pic. (Sorry I forgot to take a good one so this will have to do.)


Here is the after. Me and my now matching hair buddy. (His is natural of course. Just not fair......) I'm still getting used to it but I think overall I will like it for something different. The hubby came home from a youth group trip last evening and was really surprised. He likes it so I achieved my goal. :)


Friday, January 28, 2011

"Back in Business"

So I picked up my sewing machine yesterday! YAY! I gave it a test run this morning and it runs like a dream! Amazing what a little cleaning and oiling can do!


Here are some pictures of a project I am currently working on. It will be a crib bumper when it's done. I bought the fabrics at the store where I work. I love the puppy fabric. There are some really cute boy fabrics out there. This one matches the aqua & green stripes on my nursery walls really well. The blocks are pieced and I am working on machine quilting each section right now.


In other news tomorrow is our biggest sale of the year at work - PJ PARTY! It's from 6-9am and all in stock merch. is 40% off. That's right - 40%! The store is usually PACKED! (for obvious reasons. :) It's really fun and a great deal. Check out our website for more info. Wish me luck - I am not a morning person!! :)


I'm linking to:

giveaways

Thursday, January 20, 2011

All Things Crafty

Happy 2011~! I know that these wishes are a little late but better late than never right? It seems that with every new year I come up with a new list of "to do's" and this year the thing, or should I say, room that was on the top of my list was my craft room. I've gotten a lot done already but it is not finished yet. I've been browsing the web for some neat storage ideas and just decorating ideas in general for my creative space. I thought I'd share some pictures with you. :)

I love the use of vintage and also industrial items for storage!
This one is just so cute! I like how they color coordinated their fabric and I am loving the robin's egg blue boxes on the shelf!

So in other news...... my sewing machine decided to stop working the other day. I was a bit frustrated until I realized that my poor little Kenny (it's a Kenmore machine. hence the name.) has never been cleaned or oiled since I've had him! YIKES! That's like 5 years! I think I should be ashamed....... So I took Kenny to the local sewing machine shop for a good cleaning. I'm excited to get my machine back and work on some projects! It's so true what they say - you don't know what you have until you lose it! All of a sudden I feel like sewing. What a cruel irony.

Anyway, I've been checking out craftgawker and etsy for some inspiration. Just thought I'd share some of my findings with you. :)


Isn't this such a cute idea!! I think today I will be rooting through my closet trying to find a sweater or cardigan to add colorful buttons to.......


Ok these are just gorgeous! I love the wire wrap at the top of the beads. And the frosted finish on these beads is really cool too!


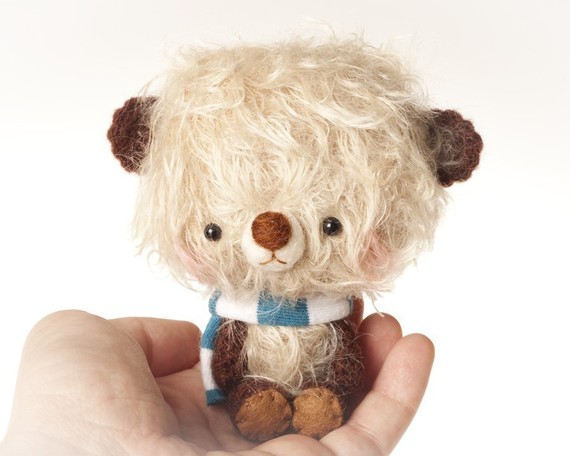
Alright. Prepare yourself for cuteness. Are these bears not the cutest little guys ever! I saw one on craftgawker and had to check it out. My 2 year old saw the picture and even he said "Cute!" And they are surprisingly affordable too for something handmade!


To close this post I would just like to say that if there is any text in this post...... or any of my posts that is capitalized where it shouldn't be it is because I often have a small boy sitting on my lap who is a bit obsessed with pushing the caps lock button so he can see the little light come on. :)

Have a great weekend!